Sunday, June 28, 2015

CYCI #76 I Think You're Great, In Colors!

Here comes another short and sweet post...for reals.  This weekend is our 11th wedding anniversary and as I write this we're headed out to celebrate what's sure to be a splendidly romantic getaway!  As you read this, we're already back, and it sure was splendidly romantic!  Thanks for caring :-)

This week canyoucaseit.com brings us a color challenge, using Stampin' Up's new In Colors!  Which are your favorites?  Don't tell me...SHOW US!!

www.canyoucaseit.com


Here are a few of my faves, along with the great I Think You're Great stamp set which I think is great!

 
Ok, so if you're a regular reader I know you'll be shocked at what I'm about to say...
 
That's all, folks!  I'm outta here!

Sunday, June 21, 2015

CYCI #75 Sketchy Schoolhouse Scene

Welcome back, me!  I've realized that it's been a while since I've been around.  I guess I had a dry streak for a few weeks now.  Sorry 'bout that.  Just been busy with the good ol' 9-5 and life in general.  Plus I hit a little creative block :-(  Don't really know why, but I guess it happens, right?  Well, I knew it couldn't last for long, or the Keeper would come a-knockin' (don't understand that reference?  Read my back story HERE).  Thankfully CYCI came along, got me off my lazy butt, and back to my desk I went.  Thanks CYCI!  Check out this week's challenge; it's a sketch design by Terri T.:

www.canyoucaseit.com

Or as I saw it:


www.canyoucaseit.com


Because, remember...


...and I'll turn it if I want to.  And so can you.  Just tell them I said it's ok.

So here's what I made:


When I first saw the design of the sketch, I knew that I needed to use some DSP (Designer Series Paper). As I looked through our rack, this one popped out at me.  It's Stampin Up's new Schoolhouse design, and I've been eyeing the bikes since the first time that I saw them.  Yes, if you aren't familiar with the paper, everything on this card except for the green grass and the white card base (and the sentiment) is part of the paper pack.  I just felt like having a little fun and getting artsy, so I made a nice summer day to share with someone.  I think it turned out pretty swell!  In fact, I thought that it would end up a little more abstract then it did, but surprisingly the scene is really readable! 

I had a lot of fun putting this together, and I had almost forgotten that this is why I started stamping in the first place... it's a way to relax and have fun!  Never forget that.  Need a break?  Just stamp.  Stressed out?  Just start stampin'.  Lost your mojo? Stamp anyway.  Need inspiration? Visit CanYouCaseIt.com and stamp along with their weekly challenge.  Not a stamper? Not too late to start.  Need a stampin' buddy?  I'll be there for you.  Feeling down?  Get our some stuff and stamp your blues away. Feeling happy?  Share your happiness though stampin'.  Feeling thirsty?  Drink some water and be careful not to spill it on your stamping spot.  Make sure you have a coaster handy. Ok, maybe I went too far, but you get the gist: Stamping saves lives.  Peace out.


Thursday, June 11, 2015

OSAT Bro Style - for a Dude, from a Dude (kinda)

Hello Hoppers, welcome back to another round of Hopping!  If you are starting here, the theme of our blog hop this month is "Masculine."  But if you have hopped here from the very talented Lori Mueller (or another Hop Host), then of course you already knew that!

With Father's Day coming up, it's a great time to showcase cards/projects for guys.  But really, Father's Day cannot be the only occasion throughout the year when a dude needs to be celebrated or recognized.  Think birthdays, promotions, umm.... birthdays, .... etc.  (Either I cant think of anything else or I just don't want to give all the answers away.  You pick.)  So this week, I decided to highlight something that could bee given to a buddy, co-worker, brother, or any other "Bro."


All supplies are Stampin" Up!
The textured/lined paper is the new Kraft corrugated paper
The "Bro" and "#BDAY" is made with the Layered Letters set
The sentiments are from Words of Truth
And the washi tape is part of the Everyday Chic collection
 
I have a confession to make.  I have to tell you something but you have to promise that you won't be mad. Promise?  Ok, here it  goes.  I kinda cheated and had help with these projects.  There, I said it.  This week was supposed to be easy peasy, since I'm a dude and I needed to make a dude card.  The problem was that I'm a dude and I waited until the last minute to start my project.  So between my non-crafty schedule and my other life events, I was exhausted and didn't have time to finish my stuff.  I was literally dozing off as I was stamping.  I even ruined a Versamark pad because I forgot to clean off a stamp before I went to start embossing.  Such a schmuck.  I almost had to miss the hop, but thankfully, I'm not the only crafty one around here.  My amazing better half was able to swoop in and save the day with her awesomeness!  So instead of having to share an unfinished product with you, I get to share one of the first ever Stampin' Stud/Paper Paradise hybrid collaborations!  How could you possibly be mad about that?  Thanks, sweetie!  Don't know what I'd do without you :-)
 
Now that my conscious is clear, back to the hop...
 
I hope that we have been able to do our part and give you some inspiration to go and celebrate a special guy in your life.  You don't need to wait for Father's Day to put away the flower stamps.  Don't be afraid to trade in the purples and pinks for grays and blues (or yellows and silvers).  Any time is a good time to play around and make a man-card.  I can tell you (as a guy) that it will be appreciated.
 
So please continue on the hopping journey to another of my talented friends, Ms. Ginger Pelfrey! See what kind of manly offerings she has to share, then continue on your way until you make it full circle.  You won't be disappointed and neither will the dudes in your life. 
 
http://myheartspleasure.wordpress.com/2015/06/11/osat-blog-hop-fathers-day/
 
And if you lose your way through the hop, no need to stop and ask for directions... I have given you a road map to follow! (see what I did there?  I tied in a male stereotype about stopping to ask for directions.  Aren't I clever?)
 
Here's the itinerary:
You are here ---> James
Next is ----> Ginger 
And then ----> Justin
And so on...
Andrea
Kim


Sunday, June 7, 2015

CYCI #73 Am I Blushing?

Howdy!  Be forewarned...I'm long-winded tonight.  Shocker!

Glad you made it for another edition of a 
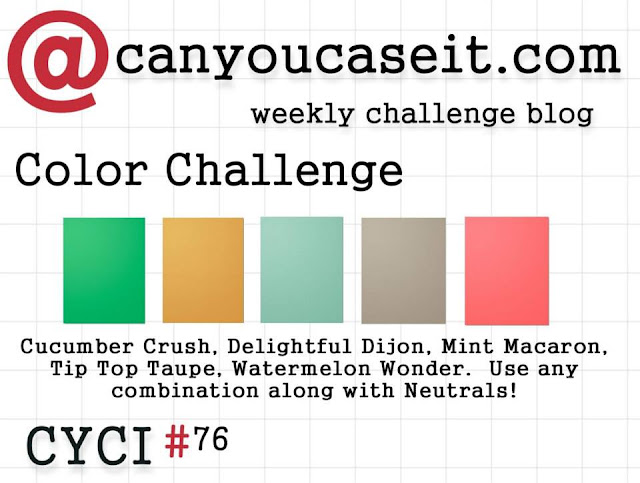
CanYouCaseIt.com challenge! This week, we have a color challenge:

www.canyoucaseit.com
 
So I was actually stuck on this challenge.  I did what I normally do when faced with a color challenge; I pull the ink pads and cardstock, lay it out on my desk, and stare at it until I see an image that I can use for inspiration (maybe something underwater, a circus tent, an animal, etc.) then I grab a few stamps sets to go with my vision and get to work.  This one wasn't that easy.  It started out just fine...the laying out of the colors and the staring was no problem!  Actually, I'm lying. It kind of was a problem.  Well not really lying, I just forgot something that happened...wanna hear about it?  Feel free to journey into my world....
 
I'm not sure if most of you know about my creative lifestyle and habits.  Let me share with you.  I'll start with the basics.  My wife is a stamper.  She's been doing Stampin' Up! for over 10 years.  Needless to say, she has accumulated many things.  Like any creative person, she is "creatively organized."  Which works out great for her.  Now here I come.  I start stamping a few months ago, and now what is hers is also mine to use.  Luckily, I have paid some degree of attention to her hobby/business through the years, and I am somewhat familiar with the supplies and general gist of cardmaking.  So when we stamp together, it's easy for me to ask her to hand me some washi tape or baker's twine, or have her tell me where the embossing folder is, and especially be able to answer the ever important "What color paper is this? Island Indigo or Pacific Point?  Crushed Curry or Daffodil Delight?"  Now fast forward to current times.  What started off as just stamping with her when she stamps has turned into me doing my thing and her doing hers.  She'll say "I have a blog post due on Wednesday and I haven't made my card yet," and I'll think "Oh, crap!  I have to make a card tonight because I have a blog hop tomorrow!"  But then she says "Well I'll just have to make something tomorrow," and I think "Oh crap!  I need to go to work tomorrow! I still need to make a card tonight!"  You see, I have a more-than-fulltime demanding job.  Plus a wonderful family of 3 daughters and an amazing wife to give my attention to when I'm not working. So when do I stamp?  Usually after 10pm.  Yep. Which is actually pretty nice.  It's quiet and it's fairly relaxing - until I hit a creative block and have a project due the next day with no inspiration to create...those nights are NOT so relaxing.  Since I tend to procrastinate and wait to make a project until the night before it's due, failure is not an option.  Neither is not being in the mood.  Good thing I'm more of a night person anyway.  So back to my life... I start stamping around 10pm, and it takes a while for the creative juices to get flowing.  So it's usually around 11 or 12 by the time I'm in the zone. And can you guess what happens then? I need something for my card.  And by that time, I can't ask anyone for washi tape, or baker's twine, or if Coastal Cabana has retired yet (sadly, I do know the answer to that one) because I'm the only one awake.  So much of my time is spent searching.  And searching.  And looking at stampinup.com to see if product is current. Then searching some more.  Then looking through the catalog to see if there's an embellishment that would work with my card.  And if there is, it's usually a blessing and a curse.  The good part is that there's an embellishment that would work with my card.  The bad part is that now I have to find it!  Lol! 
 
What does this have to do with the color challenge, you ask?  Well, the colour combo is Blushing Bride, Sahara Sand, and Basic Black.  I hadn't ever used Blushing Bride or Sahara Sand.  In fact, I actually had to leave our craft room just to find those ink pads out in the "secondary" ink caddy in the spare room.  They were among colors like Creamy Caramel, Eggplant Envy, Lucky Limeade, Gumball Green, and Cajun Craze.  So they were pretty much banished.  I always thought that was all retired stuff, but I guess I was wrong. 
 
So I grabbed the two ink pads and of course they were dried out.  But miraculously I found a Blushing Bride refill!  No luck on the Sahara Sand, though.  But as I stood in the dining room looking at the ink pads and going through the "staring" phase of my creative process, it hit me. I was holding Sahara Sand and I thought "hey, that's just a grayish-brownish color."  And I immediately thought of another brownish-grayish color, except this one was new, had coordinating accessories, and most importantly, I KNEW WHERE IT WAS!!  That's right, I'm talking about Tip Top Taupe.  So sorry to the folks at CYCI...I tweaked your color challenge a little bit, but if I never would have told you then you probably never would have known....so please forgive me and give me points for honesty.
 
Anyways, my take on the color challenge is a combo of Tip Top Taupe, Blushing Bride, and Black.  But even after I found the colors, I still struggled with the challenge.  Don't get me wrong; it's a great color combo, and the colors work beautifully together.  I just didn't have an Aha! moment. After a while, I did have a few ideas of some directions that I could go, so I headed over to the stamp shelves and grabbed a few stamp sets. I must say, that part has become SO MUCH easier since we renovated the craft room.  Before, we had a mix of current and retired sets all sharing the same shelves.  Now, we separated new from retired so I am able to focus on the current sets!  It's the little things that make me happy...
 
Now I'm back at my desk with the colored card stock, ink pads, and selected stamp sets all piled up.  I start stamping the Build a Birthday cake onto a Blushing Bride card front.  It doesn't stamp right, so I use the back, I'm not happy with it so I try another card front, and repeat until I literally went through an entire sheet of card stock.  Yes, that's 8 chances for something to work, but it didn't.  I put that set away; it wasn't meant to be. 
 
But during the process, I did get another idea.  The colors, the stamp set, and the layout I was playing with really leaned toward a "Clean and Simple" (CAS) design.  CAS is not my thing. Not my style.  I really really like the look of it, especially from superstars like Krista Frattin and Sarah Sagert, but for some reason I just can't bring myself to do it.  I guess I like to torture myself with a high degree of difficulty and complication.
 
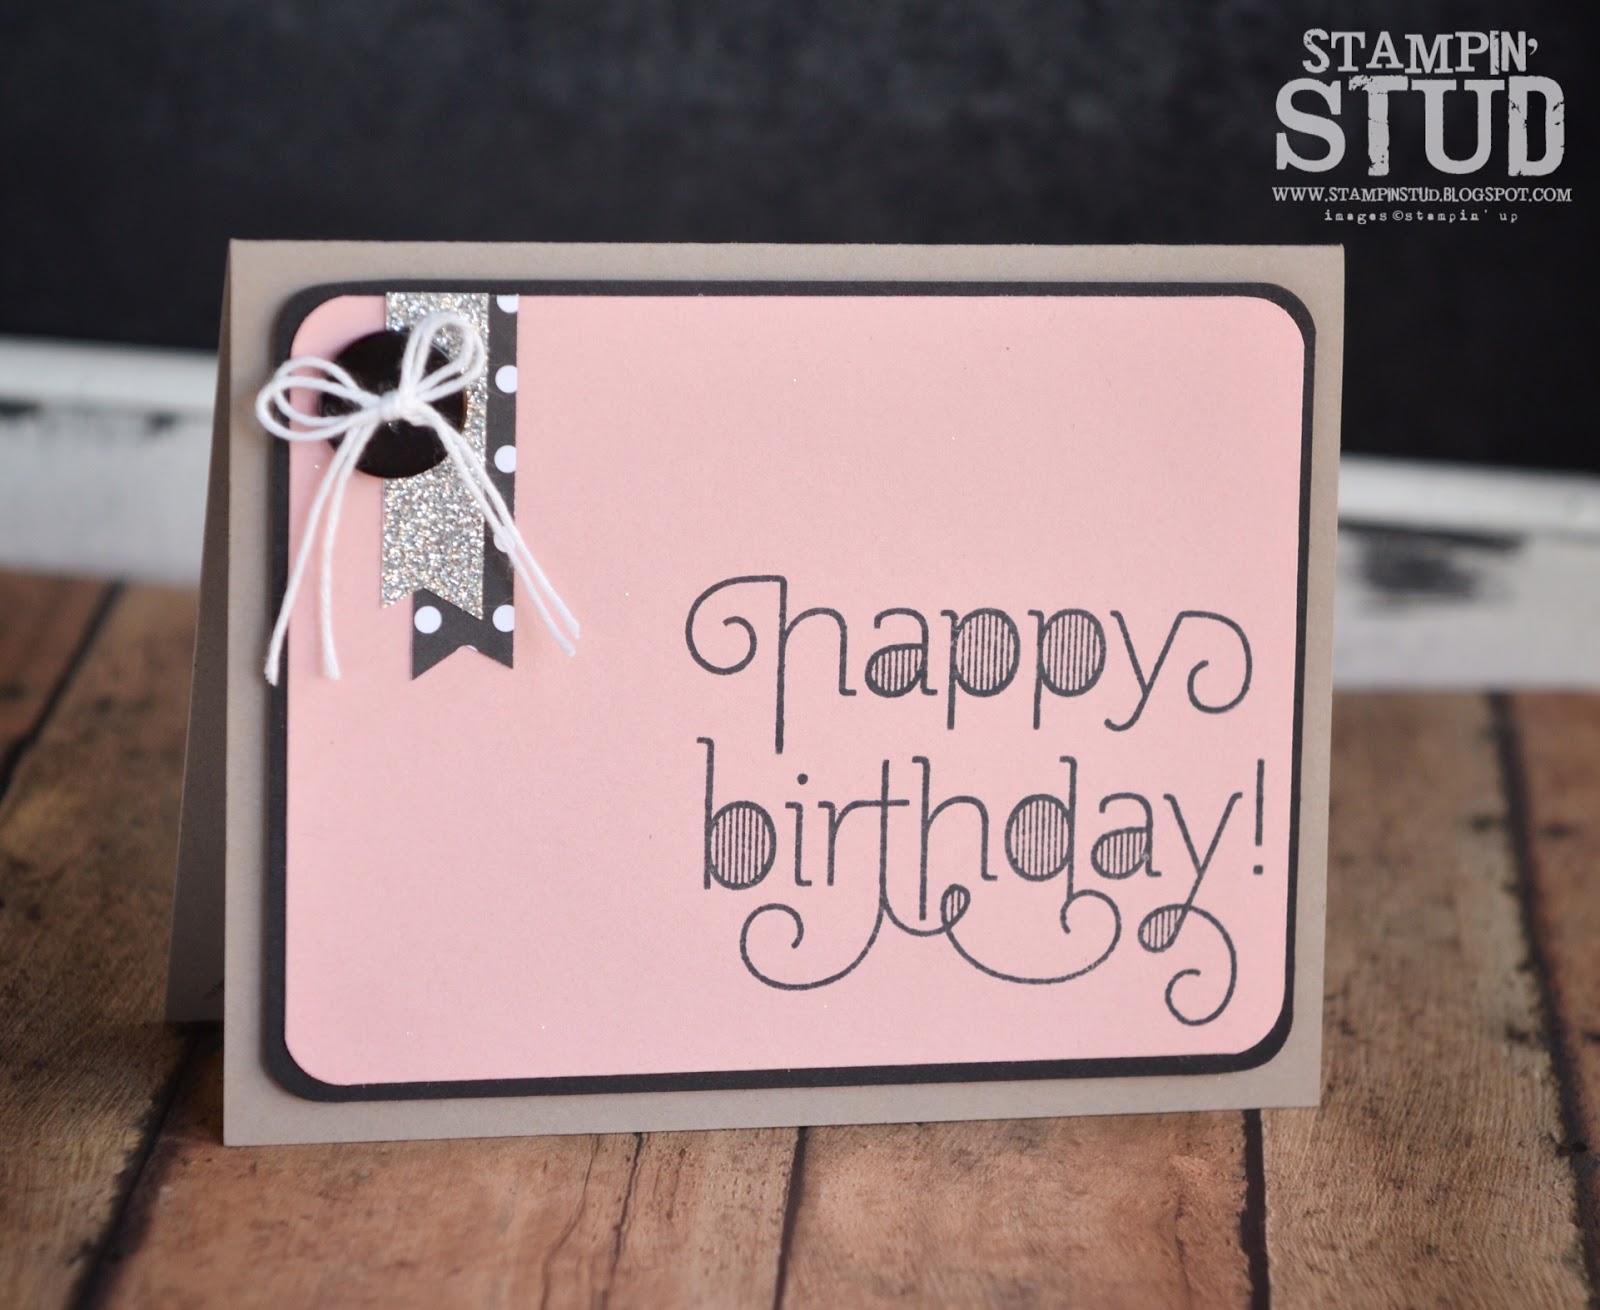
But this week I decided to go for it, and here's what it looks like:


I actually have one and a half cards for this challenge.  Ok, I didn't REALLY make half of a card, but...well, take a look:


See, I just couldn't bring myself to leave it plain.  While I do like the look of the first card, I felt like it was missing that certain je ne sais quoi and it needed a little pop of bling.  My 10 year old daughter actually helped me with this the morning after I made the first version.  I think the glimmer of silver, button, and twine bring balance to the card and complete it.
 
What do you think?  Would you have been happy if I had just made the CAS design for you?  Or did it need the extra bling?  Just want honest opinions here.  Don't worry, you won't hurt my feelings. I really do like them both.  It's just the whole CAS thing throws me for a loop....
 
Thanks for making it to the end.  Even if you just skipped the story part and stayed for the cards. Either way, I'm still glad you're here.  Don't forget to visit canyoucaseit.com to see what the other designers have to share.  After you get all inspired by these colors, bust out your Sahara Sand and Blushing Bride and get to craftin'!!  Join us this week and show off your stuff!
 
Time to hit the hay for me.  Please leave comments.  Let me know what you think about my CAS.  Should I try it again?  Or stick to complex?  What do you like? Not like?  Was this too many words?  Should I practice CAS blog writing? LOL!  Ok, for real, I need to go now. It's really late and I have a lot to do tomorrow.  Thanks for being here and reading this and liking my stuff.  See you later this week with an all new post.  Take care, y'all!

Friday, June 5, 2015

#TGIFC06 Coloring With Water!

Hey everybody.  To my regular readers (both of you), guess what I'm going to say now...

It's late here, so this will be short and sweet.  Do you believe me?  Lol.  Do you think that means that you better get comfy because there's about to be a lot of words to read?  Lol!  You know me so well...

But seriously, I think I mean it this time.  It's almost 1am and I still have to make a card for CYCI tonight, and then go to work in the morning.  EEK!  So I'm sorry that I might not be able to hang out with you, but look on the bright side...I'll be back on Sunday :-)

This week at TGIF, we have a Technique Spotlight:

http://tgifchallenges.blogspot.com/2015/06/tgifc06.html
 
Yep, just in case you didn't read the title to my post, we are colouring with water!!  Just to let you know, it was very tempting to do a flower.  But for those of you who are familiar with my style know that I just need to be different.  So that means NOT watercoloring a flower, even though that's what makes perfect sense.  I don't know why I have to always make things so hard on myself...oh well. 


I started out by grabbing Sea Street.  I thought that I would do a whole underwater scene.  But that was a little too ambitious and didn't quite turn out how I imagined.  But the "Silver Lining" (get it?) was that I discovered a new water technique as I was messing around.  Basically, I used an Aquapainter and soaked up a mixture of blue hues (Night of Navy, Island Indigo, Pacific Point, Tempting Turquois).  Then I held the tip of the "pen" just above the paper and gently squeezed until a drip started to form.  Then I touched the drip to the paper, and a dot was born.  At first, the drop beads up, but then the paper absorbs the ink/water and you get the variation of colors and shapes if you leave it alone and let it dry. The trick was to dry off the Aquapainter on a paper towel before soaking up the ink.  This gave a deeper color. Then you just keep creating drops as the colors continue to change (without re-inking).  As you go the colors will get lighter and lighter, and eventually you will know when its time to dry off the Aquapainter and ink back up again.  And you just repeat.  A few times.  Until you have the background that you want.  Simple, but its a pretty cool effect.  I can imagine doing another color combo for a totally different background; definitely something to try someday.
 
The clouds were embossed with Silver EP.  The large cloud was created using the same stamp and edging it with Versamark and more silver EP (let me know if you want the details, maybe I'll delve deeper on a technique post or a video).  The sunburst was created with a simple technique using the scalloped circle punch, and by coloring the cardstock for the contrast of a deeper shade of yellow.  Finished the card with the Silver Baker's Twine minus the Twine.  That was a test of patience if I've ever had one.  Beginner's tip of the day:  If you're doing the Baker's Twine wraparound and bow, make sure you have plenty of twine when you get to tying the bow.  Not enough twine = frustration. 
 
 Ok, that's about it.  Hope you visit TGIFC to see what our designers have colored for you.  You're sure to be inspired. 
 
See ya Sunday.  Thanks for stopping by.  I really have to go now.  No, you hang up first.  Go ahead.  Fine, I'll do it. Bye.